If you’ve ever wondered about the process of building a drone from scratch, you’re in the right place. In this article, we’ll walk you through the step-by-step guide on how to create your very own drone. From selecting the necessary components to the final assembly, we’ll provide you with all the information you need, making the process an exciting and fulfilling endeavor. So, get ready to embark on this journey as we unlock the secrets of building a drone from scratch.
Choosing the Drone Design
Introduction to drone design
When it comes to building a drone from scratch, one of the first and most important decisions you’ll need to make is choosing the right drone design. The design of a drone refers to its overall structure, shape, and size. It determines many factors such as flight capabilities, payload capacity, and even aesthetic appeal.
Types of drone designs
There are various types of drone designs available, each with its own unique characteristics and purpose. Some common designs include quadcopters, hexacopters, octocopters, and fixed-wing drones. Quadcopters, with their four propellers, are the most popular choice for hobbyists due to their stability and versatility. Hexacopters and octocopters offer increased payload capacities and redundancy, making them suitable for professional applications. Fixed-wing drones, on the other hand, are more efficient in terms of long-distance flights.
Factors to consider when choosing a design
When selecting a drone design, several factors should be taken into consideration. Firstly, think about your intended use for the drone. Are you planning to use it for aerial photography, racing, or agriculture? Different designs excel in different applications, so your choice should align with your specific needs. Secondly, consider your skill level. While quadcopters are generally easier to control, hexacopters and octocopters require more advanced piloting skills. Lastly, think about portability and transportation. If you plan to travel frequently with your drone, a compact design would be more suitable than a larger one. Take your time to evaluate these factors before settling on a particular drone design.
Understanding Drone Components
Introduction to drone components
To build a drone from scratch, it’s crucial to have a good understanding of the various components that make up a drone. These components work together to ensure proper flight control, stability, and functionality. By familiarizing yourself with these components, you will be able to choose the right ones for your drone and assemble them correctly.
Major components of a drone
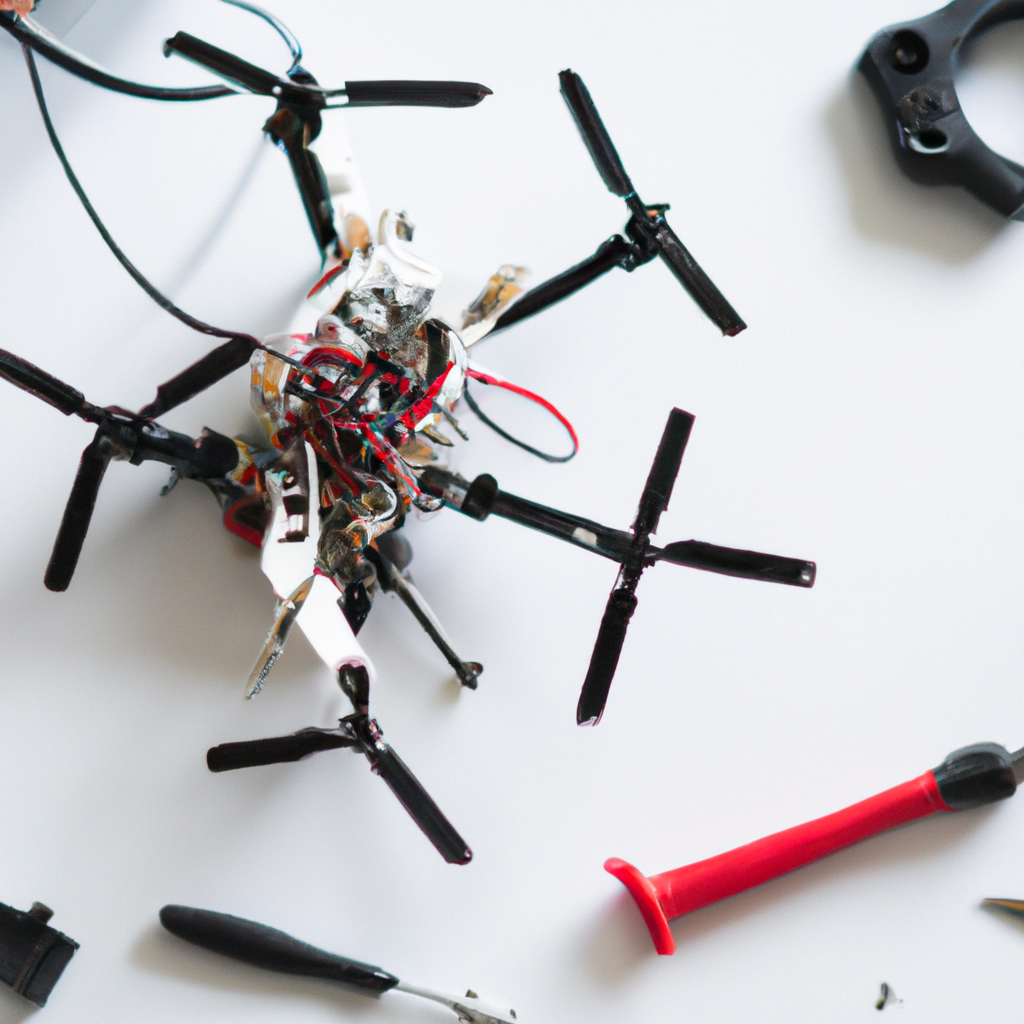
The major components of a drone include the frame, motors, flight controllers, propellers, batteries, and electronics. The frame serves as the structural backbone of the drone, providing support and housing for the other components. Motors are responsible for generating the necessary thrust to enable flight. Flight controllers act as the brain of the drone, processing flight data and sending commands to the motors. Propellers are vital for producing lift and maneuverability. Batteries supply power to the motors and electronics, while the electronics consist of various modules such as GPS, sensors, and cameras.
Understanding the roles of each component
Each component of a drone has a specific role to play. The frame determines the overall size and shape of the drone, as well as its durability and weight capacity. Motors convert electrical energy into mechanical energy, spinning the propellers and generating the necessary thrust. Flight controllers receive input from the pilot or automated systems, making adjustments to stabilize and control the drone during flight. Propellers create lift and enable the drone to ascend, descend, and change direction. Batteries provide the necessary power to keep the drone in the air, while electronics enhance its capabilities through advanced features such as autonomous flight and imaging. Understanding the roles and functionalities of each component is essential in choosing the right ones for your custom-built drone.

This image is property of images.pexels.com.
Selecting the Right Frame
Introduction to drone frames
The frame of a drone is like its skeleton, providing structural integrity and support for all the other components. Selecting the right frame is crucial, as it determines the overall performance and durability of your drone. Frames come in various shapes, sizes, and materials, each with its own advantages and disadvantages.
Different materials for drone frames
Some common materials used for drone frames include carbon fiber, aluminum, and plastic. Carbon fiber frames are incredibly lightweight, yet strong and rigid, making them ideal for high-performance drones. They are resistant to vibrations and provide excellent stability during flights. Aluminum frames, on the other hand, offer durability and strength at a more affordable price point. They are suitable for heavier drones or those operating in more rugged environments. Plastic frames are often found in entry-level drones due to their low cost, but they may lack the durability and rigidity of carbon fiber or aluminum.
Choosing the appropriate frame for your needs
When selecting a frame for your drone, consider factors such as the drone’s intended use, weight requirements, and budget. If you plan to use your drone for aerial photography or videography, a lightweight carbon fiber frame would be an excellent choice to ensure stability and minimize vibrations. However, if you’re building a heavy-lift drone for payload transportation, an aluminum frame with reinforced arms may be more suitable. It’s important to find a balance between weight, strength, and cost to meet your specific needs.
Choosing the Suitable Motors
Introduction to drone motors
The motors are arguably one of the most critical components of a drone as they generate the necessary thrust to achieve flight. Choosing the suitable motors for your custom-built drone is essential for achieving optimal performance and flight capabilities.
Types of motors used in drones
There are two main types of motors used in drones: brushed and brushless motors. Brushed motors are typically less expensive and simpler in design, making them suitable for entry-level drones or small-scale projects. They are controlled by direct current (DC) and require less complex electronic speed controllers (ESCs) to operate. Brushless motors, on the other hand, offer higher efficiency, better power-to-weight ratio, and longer lifespan. They are controlled by alternating current (AC) and require more advanced ESCs. Brushless motors are commonly used in professional drones or high-performance applications.
Considerations when selecting motors
When selecting motors for your drone, several factors should be taken into account. Firstly, consider the weight of your drone and its payload capacity. The motors should be able to generate enough thrust to lift the drone and any additional weight it may carry. Secondly, think about the desired flight characteristics. If you’re looking for speed and agility, motors with higher RPM (revolutions per minute) would be suitable. However, if you need more stability or increased flight time, motors with lower RPM but higher torque would be preferable. Lastly, ensure compatibility between the motors and the propellers you plan to use. The motor specifications should match the propeller size and pitch to achieve optimal performance and efficiency.

This image is property of images.pexels.com.
Understanding Drone Flight Controllers
Introduction to flight controllers
Flight controllers serve as the brain of a drone, responsible for processing data from various sensors and providing necessary commands to the motors. They play a crucial role in stabilizing the drone and allowing the pilot to control it effectively.
Types of flight controllers available
There are two main types of flight controllers: standalone flight controllers and integrated flight controller systems. Standalone flight controllers are compact modules that can be used with any compatible drone frame. They offer flexibility and customization options, allowing the pilot to choose the specific sensors and features they require. Integrated flight controller systems, on the other hand, come pre-assembled with sensors, GPS, and other necessary components. They are designed to work seamlessly with specific drone models and provide a more plug-and-play experience.
Selecting a compatible flight controller
When selecting a flight controller for your drone, it’s essential to ensure compatibility with other components such as the frame, motors, and sensors. Consider the number and type of sensors you need, such as accelerometers, gyroscopes, and barometers. Additionally, think about the desired flight modes and features you want your drone to have. Some flight controllers offer advanced capabilities like autonomous flight, GPS waypoint navigation, and return-to-home functions. Choose a flight controller that meets your specific requirements and integrates well with the other components of your drone.
Deciding on the Right Propellers
Introduction to drone propellers
Propellers are crucial components of a drone as they create the necessary lift and thrust required for flight. Choosing the right propellers for your custom-built drone is essential to achieve efficient and stable performance.
Types of propellers and their characteristics
There are various types of propellers available, each with its own characteristics and performance profiles. Two main factors to consider when choosing propellers are size and pitch. The size of the propeller affects the amount of thrust generated, with larger propellers generally producing more thrust. The pitch, on the other hand, determines how much the propeller blade bites into the air. Higher pitch propellers are suitable for achieving higher speeds, while lower pitch propellers provide better control and stability.
Matching propellers with motors and frame
When selecting propellers for your drone, it’s important to match them with your chosen motors and frame. Different motors have different specifications, including recommended propeller sizes and pitch ranges. Exceeding the recommended propeller size or pitch can put excessive strain on the motor and reduce its efficiency. Additionally, the frame of your drone should have enough clearance to accommodate the chosen propeller size. Consider factors such as the drone’s weight, intended use, and flight characteristics when choosing the appropriate propellers. Experimentation and testing may be needed to find the optimal propeller setup for your specific drone design.

This image is property of images.pexels.com.
Choosing the Appropriate Batteries
Understanding drone batteries
Batteries are the power source that keeps your drone in the air. Choosing the appropriate batteries is crucial to ensure optimal flight time and performance.
Types of batteries used in drones
The most commonly used batteries in drones are Lithium Polymer (LiPo) batteries. LiPo batteries offer high energy density, lightweight construction, and high discharge rates, making them ideal for drones. They come in various configurations, such as 3S (3 cells in series), 4S, and 6S, with each configuration providing different voltage and capacity levels. The voltage and capacity of the battery are important considerations when selecting the appropriate batteries for your drone.
Calculating battery capacity and flight time
Calculating the required battery capacity and flight time involves considering several factors. Firstly, determine the average current consumption of your drone, taking into account the combined power draw of the motors, flight controller, and other electronics. Multiply the average current consumption by the desired flight time to estimate the required battery capacity in milliampere-hours (mAh). Keep in mind that flight time can vary based on factors such as payload weight, weather conditions, and flight maneuvers. It’s always a good idea to have additional battery capacity to account for these variables and ensure a safe return-to-home capability.
Learning about Drone Electronics
Introduction to drone electronics
Drone electronics comprise various modules and components that enhance the capabilities of your drone. Understanding the essential electronic components is crucial for a successful build.
Essential electronic components
Some essential electronic components include the Electronic Speed Controllers (ESCs), flight receiver, GPS module, gyroscopes, and cameras. ESCs control the speed of the motors and convert electronic signals from the flight controller to motor movements. A flight receiver enables communication between the pilot’s controller and the drone’s flight controller. GPS modules provide accurate positioning information, allowing for autonomous flight and precise navigation. Gyroscopes help stabilize the drone by measuring its angular motion. Cameras, such as GoPro or FPV cameras, capture aerial footage or enable real-time video transmission.
Connecting and wiring the electronic components
Properly connecting and wiring the electronic components is crucial for the functionality and reliability of your drone. Follow the manufacturer’s instructions and wiring diagrams for each component to ensure correct connections. Pay attention to correct polarity, wire gauges, and insulation to prevent short circuits or damage to the components. Additionally, consider the layout and placement of the electronics within the drone frame to ensure efficient cable management and reduce the risk of interference.

Assembling the Drone
Preparing the workspace
Before assembling your drone, it’s essential to prepare a clean and organized workspace. Make sure you have all the necessary tools, components, and safety equipment readily available. Clear the area of any clutter or distractions that may affect your concentration during the assembly process. Having a well-organized workspace will help you stay focused, prevent errors, and make the assembly process smoother.
Step-by-step drone assembly instructions
To assemble your drone, carefully follow the step-by-step instructions provided by the drone kit manufacturer or reference detailed online guides. Begin by attaching the motors to the frame according to the specified orientation. Then, connect the ESCs to the motors and route the motor wires neatly along the drone arms. Mount the flight controller, GPS module, and other electronic components securely onto the frame, ensuring proper alignment and orientation. Connect the necessary wiring, ensuring proper polarization and insulation. Finally, attach the propellers to the motors, ensuring they are tightened correctly and spinning freely. Carefully double-check all connections and fasteners before moving on to the next step.
Safety precautions during assembly
During the drone assembly process, it’s vital to prioritize safety. Always handle sharp or delicate components with caution and use appropriate tools for each task. Ensure all power sources are disconnected and switches are off to prevent accidental motor spin-ups. Avoid placing components near areas of high heat or moisture, as it can affect their performance and lifespan. When soldering connections, use proper safety precautions such as eye protection and a well-ventilated area. Always refer to the manufacturer’s guidelines and safety recommendations to ensure a safe and successful drone assembly experience.
Testing and Troubleshooting
Pre-flight checklist
After assembling your drone, it’s essential to perform a thorough pre-flight checklist to ensure everything is in proper working order before attempting a test flight. The pre-flight checklist should include items such as inspecting the frame for any damage, checking the tightness of all fasteners and propellers, verifying the correct orientation of all components, ensuring the flight controller is properly calibrated, and confirming the responsiveness of the motors and controls. Following a pre-flight checklist helps minimize the risk of accidents and ensures a smooth and safe test flight.
Performing test flights
Before taking your drone on its maiden flight, it’s essential to start with short and low-risk test flights to evaluate its stability, responsiveness, and overall performance. Choose a spacious outdoor area away from obstacles and people. Slowly increase the flight duration and altitude as you gain confidence in the drone’s capabilities. Pay attention to any abnormal vibrations, drift, or loss of control during the test flights. Use the flight controller’s stabilization features to assist with initial flights and gradually transition to manual control as you become more comfortable. It’s also crucial to adhere to local regulations and fly responsibly during the test flights.
Common issues and troubleshooting techniques
During the test flights, it’s possible to encounter common issues that may require troubleshooting. Some common issues include unstable flight, erratic motor behavior, calibration problems, or connectivity issues between components. It’s important to approach troubleshooting systematically, ruling out potential causes step by step. Check for loose connections, incorrect wiring, or damaged components. Ensure firmware and software are up to date for all electronic components. Consult online forums, manuals, or seek advice from experienced drone builders if you’re unsure about a particular issue. Troubleshooting can sometimes be a process of trial and error, but with patience and persistence, most issues can be resolved.


